How many of you with a kitchen island sink hate that ugly dish rack sitting on your counter? I for one, loathe it. My kitchen is a very busy one. I get enough dishes to load an entire dishwasher and then some. Like every other Indian household, I have lots of pans, pots and plates in metals like cast iron, copper and silver that require hand washing.
So, when we moved into our new home a couple of years ago, the one thing that didn’t seem to fit in well was that the kitchen sink was in the island. I love a kitchen island and I love a big kitchen sink. What I hate is when they both come together a.k.a a kitchen island with a sink!!!!! And the only reason for that is that big ugly drying rack that sits right next to the sink, on the counter with dishes hanging off it through the day. I would rather have that in some obscure/not so visible corner.
Honestly, a drying rack is an absolute necessity in my house. I’ve seen people make do without one, but uh-uh, not me! Me and that drying rack, we share a love-hate relationship. I cant live WITH it, I cant live WITHOUT it!!! Share that feeling?
If you’re reading further, you get me, don’t you? Worry not, dear friend, I have a solution for you! This solution will work for everyone who has a shelf to spare right next to the sink (preferably).
Lo and behold! Presenting my hidden In-Cabinet Dish Drainer. Check it out! This is how the answer looks! It’s just your regular cabinet with a few embellishments to suit your dish drying needs.

The most important thing that you need to do to convert your cabinet into a drying rack would be to ensure minimum or no moisture build up anywhere inside of your cabinet.
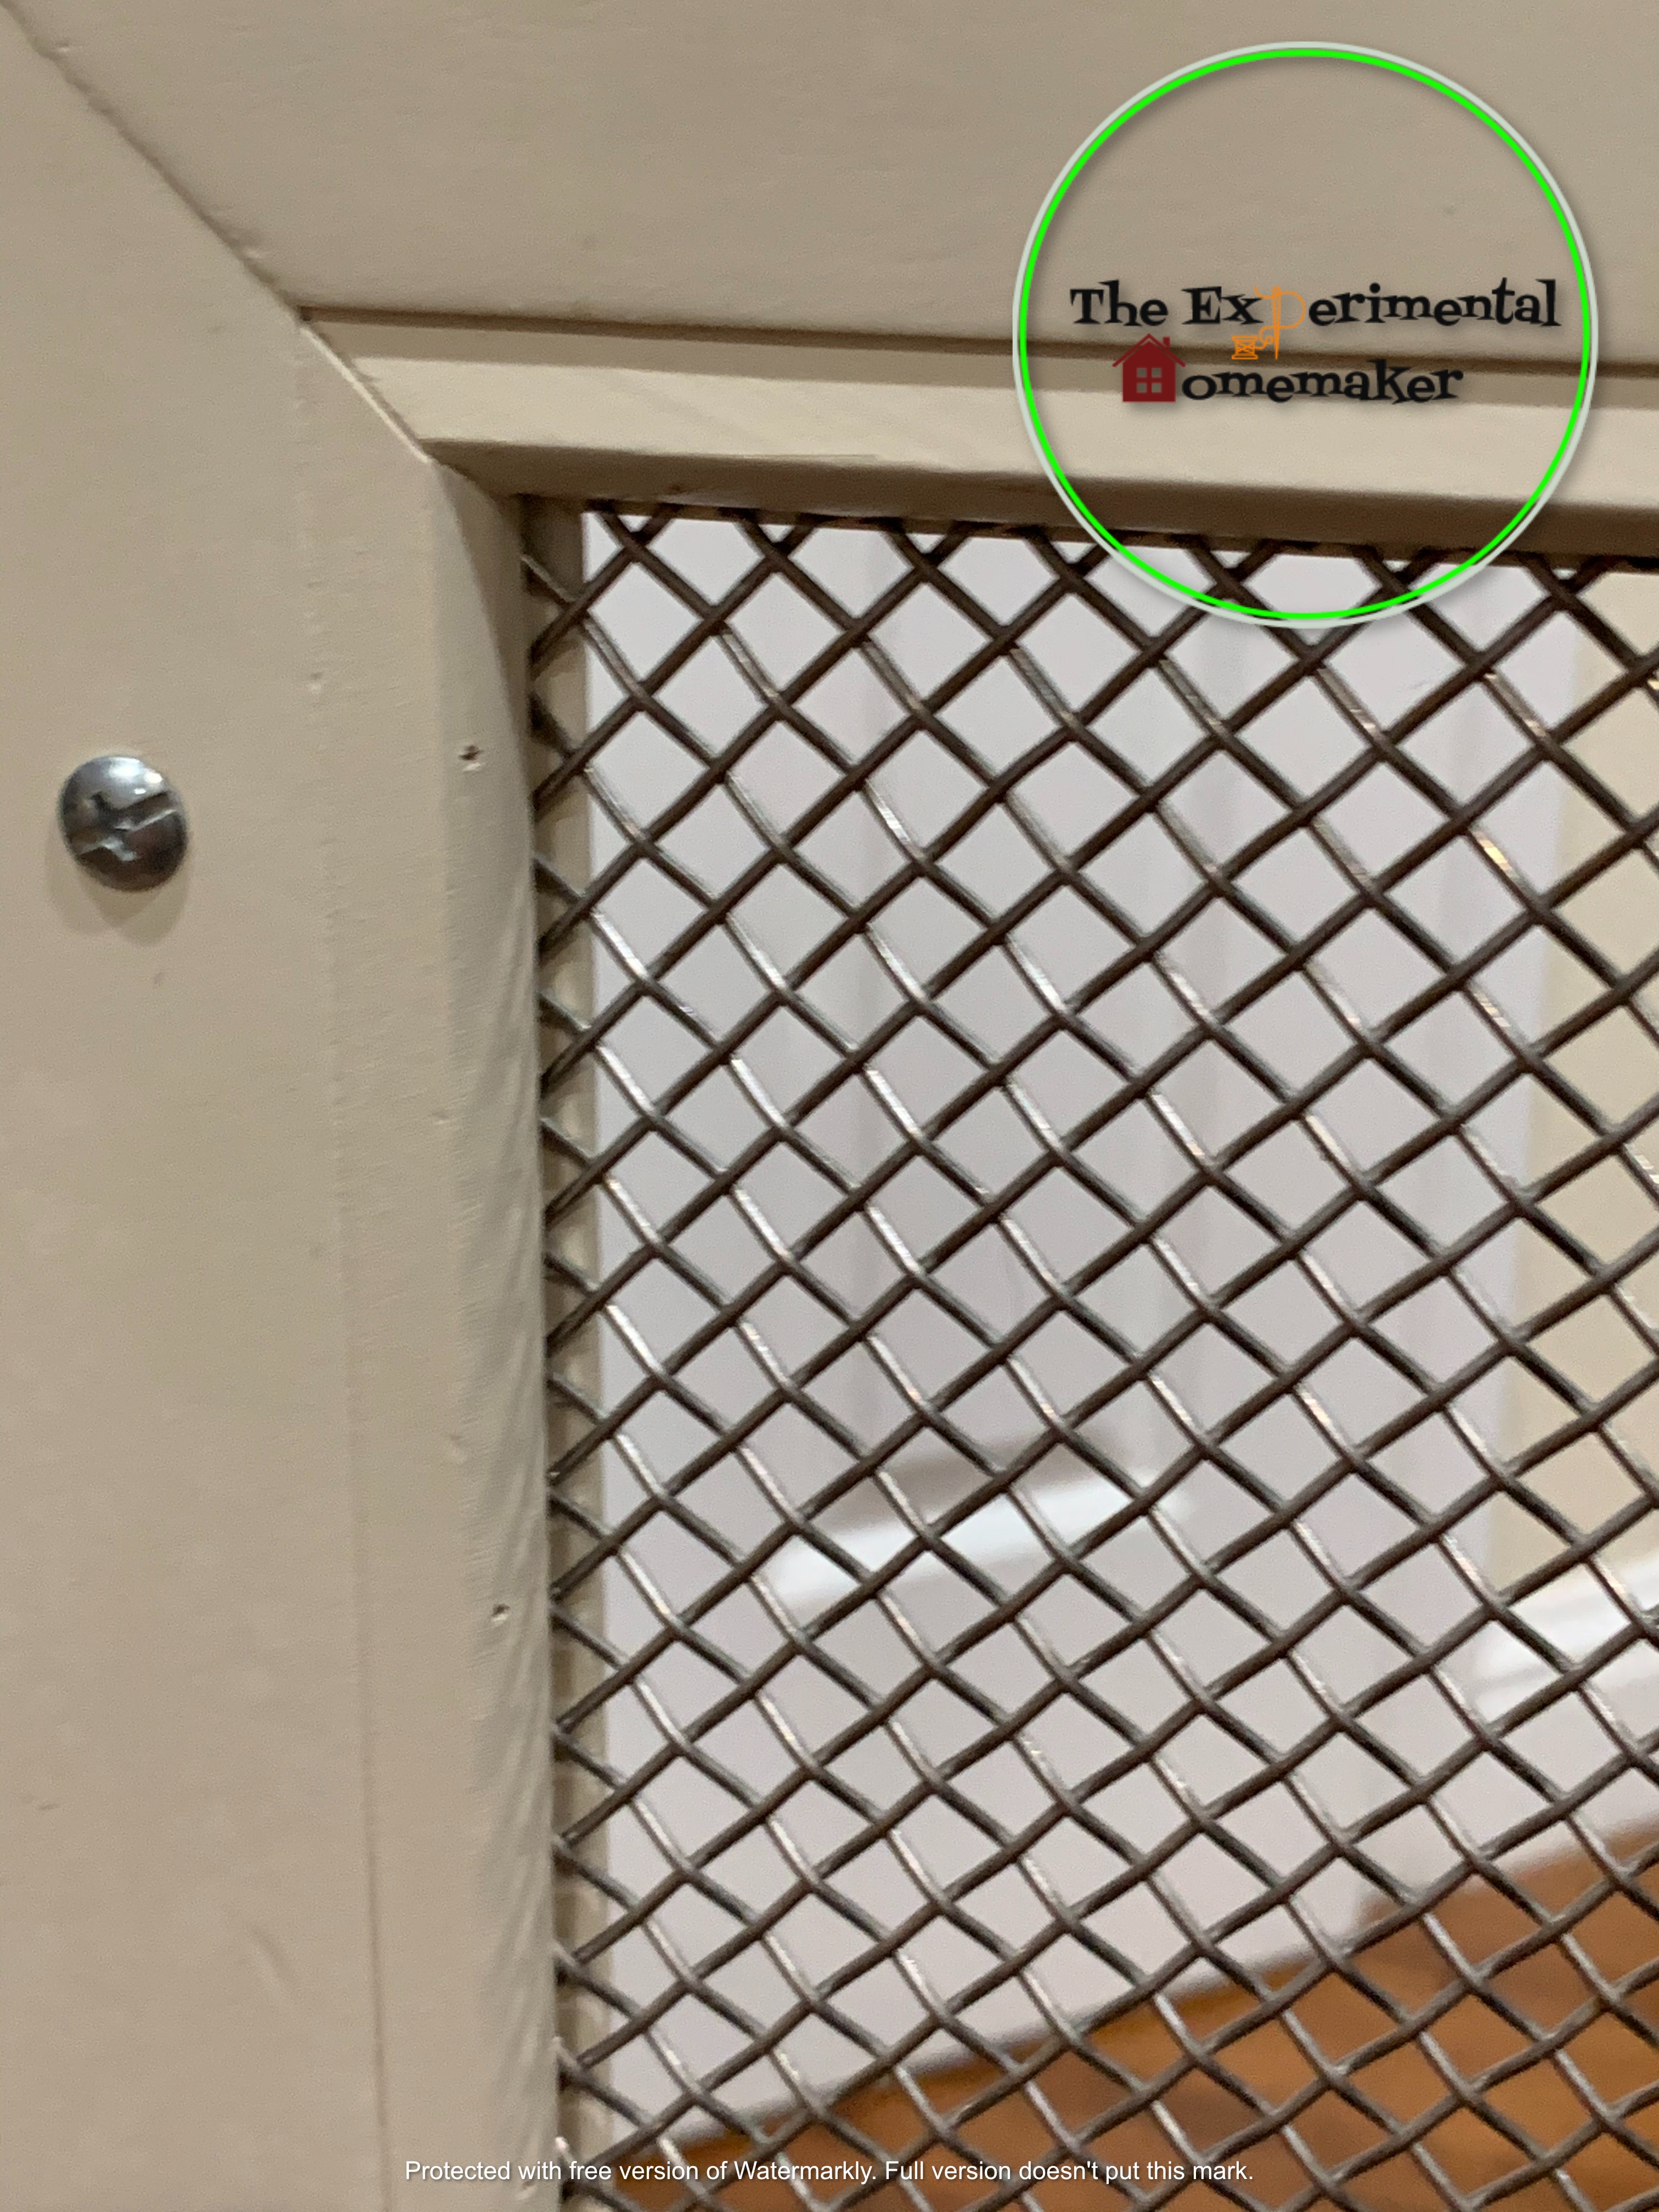
First and foremost, you would find a door that can provide ventilation to air dry your dishes. This was the most tricky part in the renovation. The rest is a breeze, I can assure you. (If your cabinet is hidden from sight, you could choose to keep it door free 😀 and it would work just great. Just saying!)
To change your regular cabinet door to a mesh door, you might need a handyman if you are’t very savvy with DIY. While there are many kinds of meshes available in home improvement stores which are made from galvanized metals and are available as sheets that can be easily cut with a metal cutter, the one I have used is high quality industrial strength rust free stainless steel mesh (only because at that point, I had access to a good carpenter). No worries, if you don’t, there are many tutorials online on how to add mesh door to your cabinets, using the galvanized metal sheets you can buy from any home improvement store.

After we ordered the mesh online, my carpenter had to flatten it which he said was the most difficult part of the job. Thats because the original sheet comes rolled. (this is not chicken wire mesh, mind you, this is very good quality steel). Once he straightened it, he just had to cut it to size and place it on wrong side of the door frame and add beading along the sides to secure it with tiny nails and glue.

Another place to avoid moisture build up would be the insides of your cabinets. We painted the insides with water proof outdoor paint in a dark color that matches the floor, just so the dishes inside don’t stand out.
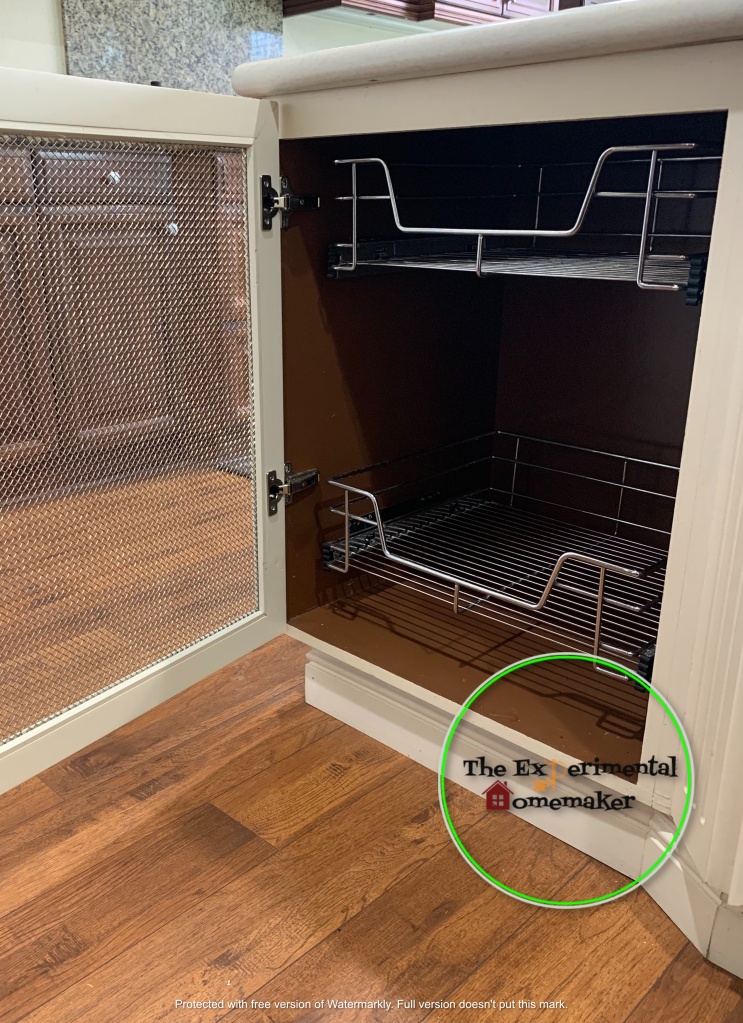
For the shelves, we ordered steel pull out drawers and attached them to the cabinet. These can easily hold 40-50 lbs, so I don’t have to worry about leaving my heavy cast iron pans in there.

Also, for additional protection, I lined the shelves with fabric drying mats which I throw into the wash once every week. I alternate between two sets of drying mats that I bought specifically for this purpose.

I’ve been using it for a couple of years now and have no complaints so far. My rack is big enough to hold my counter top dish drying rack, so i just placed on the shelf. Dump all those dishes inside, shut the door and poof, see it all vanish, until you need them next morning, all dry and ready to use!
The best thing about this is, the solution is stylish as well as flexible. Let’s say you put your house up for sale and the new owner isn’t a big of hand washing and would rather use the cabinet space, this can still be utilized as your regular every day cabinet ( a contemporary one at that :)).


And not to forget, the icing on the cake, a shiny clean counter top! TA_DA 🙂


FAQs and Links
- Stainless steel Mesh is from www.McNicols.com. They have an extensive collection.
- If you prefer to use perforated sheets instead, you could places like Home Depot for radiator covers. They come in varied designs. These are made of aluminum though. To prevent rusting, you could probably spray paint them with water paint on the inside.
- Good quality Stainless steel draws can be found on Amazon/Wayfair easily. I dont exactly remember the brand I used, but Its working great. According to the labels, each drawer can handle 20-30 lbs of weight.
Some good tips on updating cabinets with wire mesh inserts can be found in these links *https://www.familyhandyman.com/project/ideas-for-the-kitchen-cabinet-door-inserts/ *https://www.addicted2decorating.com/how-to-add-wire-mesh-grille-inserts-to-cabinet-doors-the-easy-and-inexpensive-way.html
Until next time, Happy Making!